
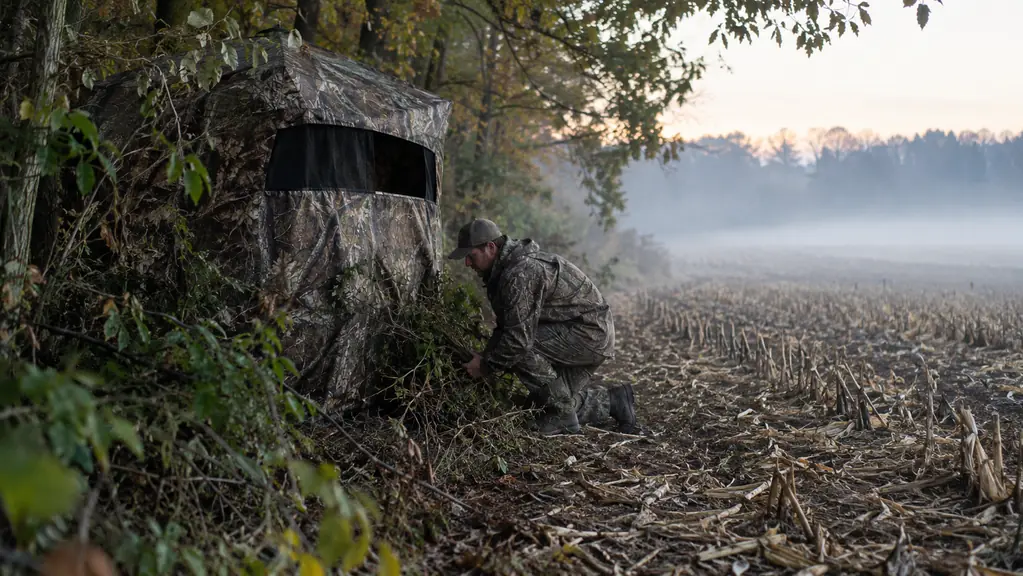
Every year about this time I see the same mistake. Hunters haul a brand new ground blind to the edge of a field, pop it open, climb inside, and wonder why the deer blow out at forty yards. The blind is not the problem. The problem is that it looks exactly like what it is: a big dark box sitting where no big dark box has ever sat before. I have been hunting whitetail out of Ameristep blinds for the better part of fifteen years, and I can tell you the difference between a blind that gets passed at close range and a blind that gets circled wide is almost always the brushing. Two seasons ago I sat in a brand new blind I had not brushed yet, just to test the windows, and a button buck came out of the ditch at eighty yards, looked straight at the blind, and left. Same spot, brushed in a week later, I had does walk past at fifteen yards. That contrast is the whole lesson, and it is why I brush every blind I set, even the ones I only plan to hunt once or twice.
The Ameristep Caretaker is a good blind out of the box. It is quiet, it is roomy enough for me and Tucker on a slow morning, and the windows give you a full view without much movement. But out of the box it is also a big dark box. If you want it to blend into a field edge instead of sitting on top of it, you have to do the work. I set mine up in about ten minutes by myself, and the built-in brush loops save me from carrying zip ties and bungee cords. On a windy ridge it has stayed put where a lighter blind would have tumbled. This is the method I use every fall, and it has held up through plenty of windy mornings and a few wet ones.
Start with a blind worth brushing in
The Ameristep Caretaker has the brush loops, the quiet fabric, and the window coverage to disappear into a field edge. Check today's price on Amazon and see if it fits your setup.
Amazon Check Today's Price on Amazon →Step 1: Pick the right spot before you touch a single branch
Brushing starts with location, not cover. A blind sitting in open grass will never look natural no matter how many branches you pile on it. The best spot has something behind it already: a treeline, a row of cedars, a brushy ditch, an old fenceline grown up with dogwood. You are not trying to build a fortress. You are trying to make the blind look like part of a place where deer already feel comfortable. The spot I hunt most sits on the west edge of a picked cornfield, about a hundred yards from a creek bottom where the deer bed. They trail out through a strip of tag alders, and that strip is what I want behind the blind, not open sky.
I look for a spot that gives me two things. First, a backdrop that breaks up the outline of the blind from the field side. Second, a path in and out that I can use without crossing the area I expect deer to approach from. That second one matters more than most people think. If you brush in a blind perfectly but then walk straight across the field to reach it, you have taught every deer in the area to avoid that corner. Last fall I watched a neighbor set a blind in the middle of a cut bean field. He brushed it heavy, and it still looked like a pile of brush sitting in a field, because there was nothing behind it. He moved it after a week.
Set the blind up the same way you plan to hunt it. Face the windows toward the direction you expect deer to come from, usually the food source or the trail leading to it. Then take a long look from the field side before you add a single branch. Walk out fifty yards and crouch down to deer eye level. What sticks out? Usually it is the roof line, the corners, and any shine from the window material. Those are the spots your brushing needs to address first.
Step 2: Gather the right material, and gather plenty of it
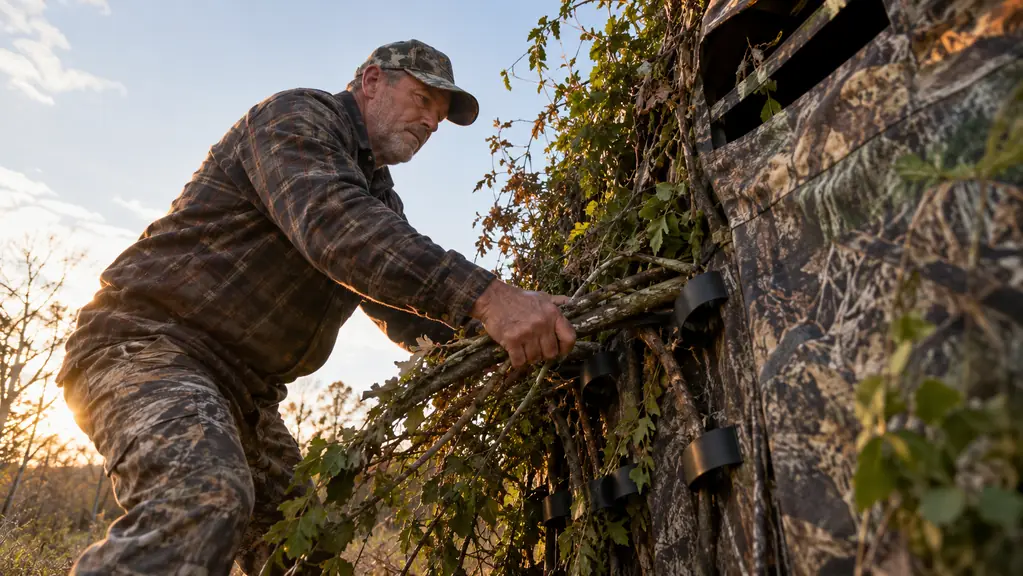
The biggest mistake I see is using too little brush and using the wrong kind. Three or four evergreen branches stuck in the loops do not brush in a blind. They decorate it. You need enough material to break up the outline, and you need material that matches what is already growing around the blind. I use a folding saw and a pair of loppers, and I cut from the same cover I am matching, not from the nearest tree. That way the leaves and the bark match what the deer see every day.
If the blind is against a hardwood treeline, use hardwood branches with leaves still on them. If it is against cedars, use cedar boughs. If it is in a weedy field edge, use the tallest weeds and grass you can pull. Matching the local vegetation does more than any amount of foreign material. A pine bough against an oak line looks wrong to a deer even if the deer cannot tell you why.
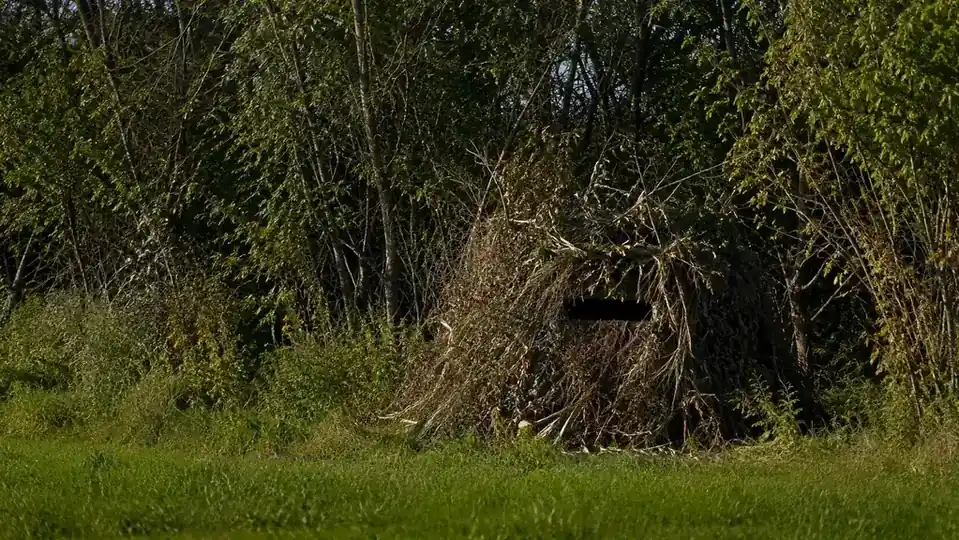
I gather armloads of material, more than I think I will need, and I sort it as I go. Long straight branches for the sides and roof, leafy stuff for filling gaps, and grass or weeds for the bottom edge where the blind meets the ground. The Ameristep Caretaker has brush loops sewn into the fabric, which makes this part easier than it used to be. You push the butt end of a branch into the loop and the blind holds it in place without any extra work. Last October I spent a good hour and a half cutting and hauling, and I used every bit of it. By the time I was done, the blind looked like a clump of dogwood that happened to have a window.
Step 3: Work from the bottom up and break up the outline
Start at the bottom and work your way up. The bottom edge is the part deer see first, because it is at eye level and it is the part that contrasts most with the ground behind it. Lay grass, weeds, and low branches along the base of the blind to blend that line into the surrounding vegetation.
Then work the sides, pushing branches into the brush loops at angles, not straight up and down. Angled branches look natural. Straight up and down branches look like a fence. Overlap them so no part of the fabric shows through, and use the leafy ends to cover the seams between branches.
The roof is the part most people skip, and it is the part that gets you busted. From a deer standing in the field, the roof line of an unbrushed blind is a clean silhouette against the sky. A couple of long branches laid across the top and locked into the loops will break that silhouette completely. The Caretaker has enough loop coverage that I can get the whole roof broken up without any part of the fabric showing. A couple seasons back I skipped the roof on a new spot and paid for it. A doe stood at sixty yards and stared at the blind for a good five minutes before she turned and worked her way back into the timber. She never spooked, she just did not trust it.
Step 4: Check the shooting lanes before you finish
Here is where I used to make my own mistake. I would brush in a blind until it looked perfect from the outside, climb in, and realize I could not see out of half the windows. The solution is simple if you do it in the right order. Brush the outside, then get inside the blind and check every window from a seated position. I remember one cold morning I had a decent eight-point buck stop at the edge of the field, and the only shot I had was straight through a branch I had left across the window. He stood there long enough, and I still could not take the shot clean.
Cut or reposition any branch that blocks a shooting lane. You want the window openings clear from your eye level to the spot you expect the deer to appear. Leave enough brush around the edges of the window to keep the opening from looking like a perfect dark square, but do not leave a branch hanging through the middle of your view.
This is also the time to set up your seat and your shooting sticks, not the morning of the hunt. Arrange everything so you can move quietly and bring your gun or bow up without knocking branches. A blind that is brushed in well but arranged badly will cost you shots all season.
Step 5: Let it settle, then refresh it through the season
Once the blind is brushed in, leave it alone for at least a few days before you hunt it. Deer need time to get used to a new object in their area. The longer it sits, the more natural it looks. I have had spots that took a week to produce, and I have had spots that produced on day two. Either way, the settling time is part of the setup.
The brushing does not last forever. Leaves dry out and drop, branches sag, and a good wind will rearrange things. Plan to refresh the blind every couple of weeks, or after any big storm. Keep a stash of material near the blind so you can do a quick touch-up without dragging branches from fifty yards away. In October the leaves on cut branches dry out fast, sometimes inside a week. By late October I am usually refreshing every ten days or so, and always after a windstorm.
This is also the time to check the Ameristep Caretaker's fabric and zippers. The Caretaker has held up well for me over a few seasons, but any blind will show wear if you ignore it. A quick walk around the blind before you hunt can save you from finding a tear or a stuck zipper on a cold, dark morning.
What Else Helps
A few extras make a brushed-in blind work even better. A dark interior helps a lot. The Ameristep Caretaker has a dark interior that cuts down on the silhouette you present when a window is open, and it is one of the reasons I keep going back to this blind. Add a small piece of camo netting inside the window if you want extra shadow, but do not overdo it or you will block your own view.
Scent control matters just as much as visual cover. Brush in the blind, but then approach it from downwind and use a cover scent or a scent-eliminating spray. A blind hides you from a deer's eyes, not its nose. I have had deer walk within fifteen yards of a well-brushed Ameristep Caretaker and never know I was there, but only when the wind was right. I keep a bottle of scent spray in the truck and hit the blind from ten feet out before I walk in. It is not a substitute for playing the wind, but it does not hurt.
I have had deer walk within fifteen yards of a well-brushed Ameristep Caretaker and never know I was there, but only when the wind was right.
One more thing: do not brush the blind so tight that you cannot see movement. The whole point is to hide you, not to box you in. Leave a few small gaps at the edges of your field of view so you can pick up movement without moving your head. A blind that hides you perfectly but keeps you from seeing the deer is just a tent with a view of nothing.
Get the blind that holds its shape through the season
The Ameristep Caretaker gives you a quiet, roomy base for a well-brushed setup. Check today's price on Amazon and see if it fits your hunting plan.
Amazon Check Today's Price on Amazon →